Showing posts with label dessert. Show all posts

Strawberry Compote/ Drizzle Recipe using Honey (No Sugar!)


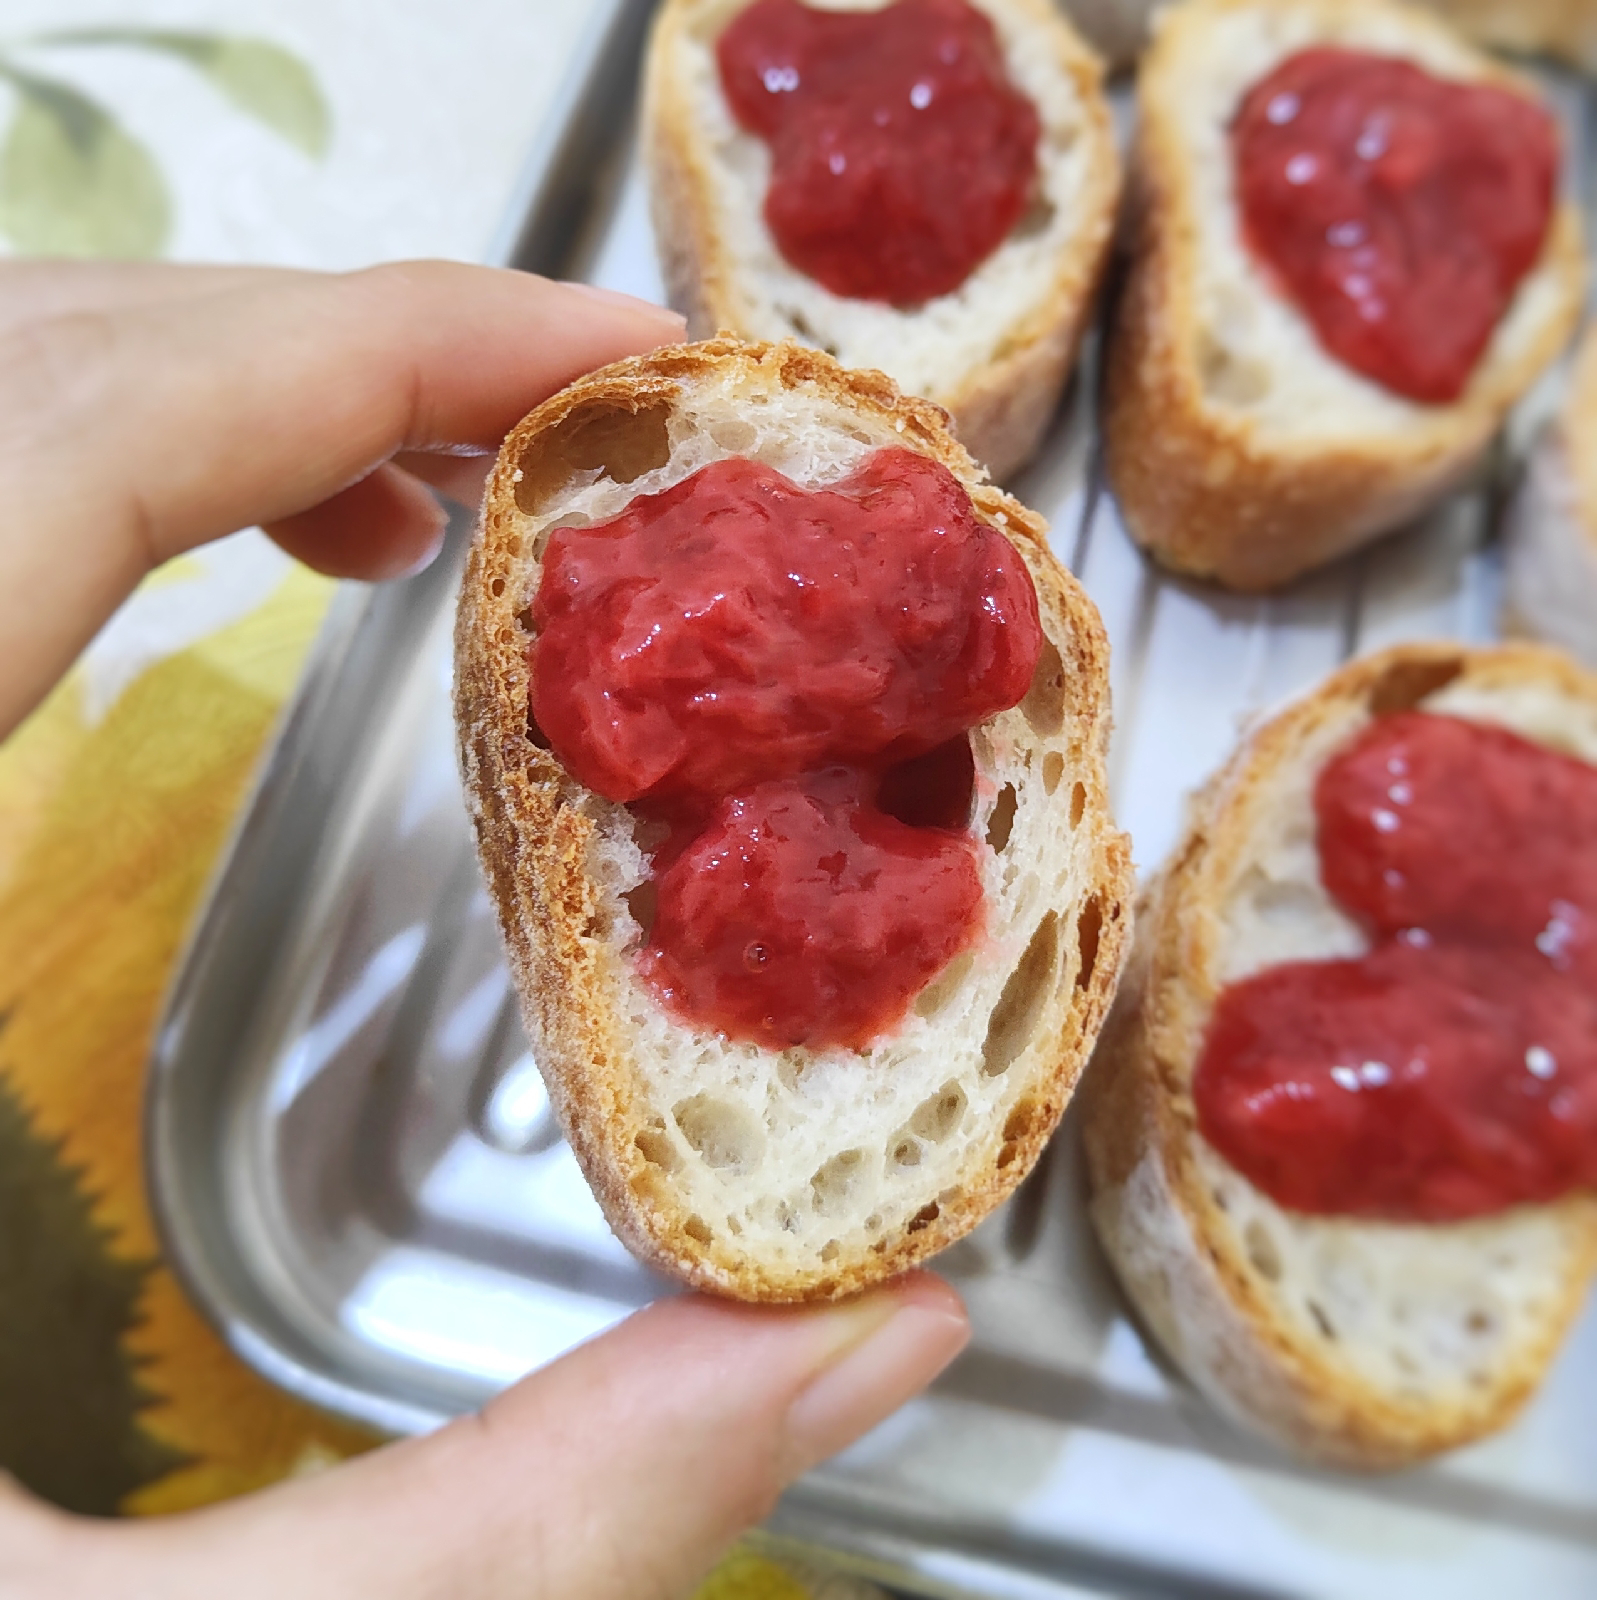
This strawberry compote is a naturally sweet and versatile topping that celebrates the fresh, vibrant flavours of strawberries. I like how this recipe swaps refined sugar for honey, creating a healthier, all-natural delight that perfectly balances sweetness and tartness.

Whether it is served over yogurt, pancakes or cakes, you can drizzle this honey-sweetened compote to add a touch of summer while retaining the wholesome goodness of the fresh fruit. 

Feel free to use other berries/ fruits and tweak this recipe to your liking!


Recipe: Strawberry Compote/ Drizzle
Makes 150g

Ingredients
  • 300g fresh/ frozen strawberries - if using frozen berries, don't need to thaw beforehand.
  • 15g honey
  • 1 teaspoon vanilla extract (optional)
  • Pinch of salt

Instructions
1. Cook
In a medium saucepan, mix all the ingredients together. Stir over medium heat for 5-7 minutes, until the strawberries start to break down and release their juices.

If using frozen strawberries (like me), this process will take another 10 minutes more.

Tips: Don't stop stirring, else it may burn!
2. Thicken
Lower the heat. Continue to cook for another 15 minutes until the compote is reduced to about half - or reaches your desired thickness.

For a smoother consistency, you can mash the strawberries with a fork.
3. Cool
Remove from heat and cool at room temperature. The compote will thicken as it cools.

4. Enjoy
Serve the strawberry compote over cakes, pancakes, waffles, yogurt, ice cream or even as a jam. Enjoy!
To store, keep the compote in an airtight container and refrigerate for up to a week!

If you have tried this recipe too, tag/ share your photos with us and stand a chance to be featured!

[Recipe] Pineapple Almond Cake


This delightful pineapple cake, made with almond flour, is a tropical twist on a classic dessert. I like how moist it is, and it is overall very easy to bake. It's a no-fail recipe!

After baking, let it cool before serving, and consider serving it with some Dole pineapple juice or topping it with a light coconut cream for an extra touch of tropical bliss! Enjoy every bite! 


Recipe: Makes 1 loaf cake (6.5 X 3 X 3 inches)

Ingredients

(A) Dry ingredients
90g almond flour
40g cake flour/ top flour
1/2 tsp baking powder

(B) Wet ingredients
100g butter, softened
65g caster sugar
2 eggs

(C) Pineapple slices 

Recipe

1) Preheat oven at 180 degrees C for 5 min.

2) Sieve almond flour.


3) In the same container, add the sieved top flour.

4) Add baking powder and mix all dry ingredients well.

5) In another bowl, add sugar to the melted butter. (Tips: Do in 3 batches!)


6) Add eggs in. Mix well.

7) Prepare the pineapple slices.

8) Make a well for the dry ingredients. Add the wet ingredients and combine well.


9) Pour the batter into 2 trays and place pineapple slices on the top.


10) Bake at 180 degrees C for 30min, till golden brown.


Enjoy the cake with a glass of Dole pineapple juice!


For more cake recipes, click here.

If you have tried this recipe too, share your photos with us and stand a chance to be featured!

Follow me for more recipes and food-related reviews.
Instagram: @TheHedgehogKnows

[Recipe] Chinese Pear and Longan Dessert Soup


Chinese pear and apricot kernels are traditionally known to be beneficial for respiratory health, and I really like how this recipe requires no added sugar at all.

This recipe is simple to prepare and can even be completed during lunch time when you work from home. I have included both the traditional boiling and pressure cooking timings - but of course if you have a pressure cooker too, just use that. It's much faster. Enjoy!


Chinese Pear and Longan Dessert Soup

Ingredients:
▪️ 2 pears, deseeded and diced
▪️ 20g apricot kernels
▪️ 40g red dates, deseeded and chopped
▪️ 40g dried longans
▪️ 2.4 litres water
▪️ 30g wolfberries

Directions:
1) Soak.
Soak apricot kernels in hot water for 30 minutes to soften it.

2) Add.
Add all the ingredients except the wolfberries into a pot.

3) Cook.
▪️Boil: Boil for 30 minutes until the pear is soft.
▪️Pressure cooker: Cook on HI for 10 minutes and do a natural release.

4) Add.
Add wolfberries. Stir. Serve hot.

Ninja Foodi Multi-functional Gadget
If you need a recommendation for a pressure cooker, I use the Ninja Foodi OP300. This all-in-one kitchen gadget can pressure cook, steam, slow cook, sear, saute, air crisp, bake, roast and grill. Very useful! Find out more about it on Ninja Kitchen's webpage.

Quote HEDGEHOGFOODI to get this at a special price of S$374.25 (U.P. S$599) with free delivery. Interest-free instalments are now available too.


Follow me for more food-related reviews and recipes:


[Recipe] Red Bean Soup Dessert using Pressure Cooker


Red bean soup is a common Cantonese dessert, available at many dessert stalls or restaurants. Red beans, sometimes known as azuki beans, are good for improving heart health and digestion,  balances sugar levels in the body.

Some recipes call for the use of rice or glutinous rice to thicken the dessert, but my mum uses oats. It's definitely a healthier version!

Below is my recipe using the pressure cooker. My mum uses traditional boiling and takes around 1 hours but I take half her time. Either way, both contain the same nutritional benefits! :) 


Recipe: Red Bean Soup Dessert Using Pressure Cooker

Ingredients (Serves 4)
120g red bean
30g dried longan
30g sugar
20g oat
10g lotus seed - optional 
2 dried tangerine - optional 
1 litre water

Directions

1. Prepare tangerine peel.
Use a knife to carefully scrape away most of the white pith on the inside of the peel. The while pith is bitter, so we don't want that. :)

2. Prepare lotus seed (if using).
Soak lotus seeds for 30 minutes. Split each into half and remove the black germ in between. 

3. Pressure Cook.
Add the red beans, lotus seeds, tangerine peel and water into the pot. Pressure cook on High for 20 minutes. Quick release when it is ready.

4. Prepare oats.
Meanwhile, add some (boiling) hot water to the oats. Stir and set aside.

5. Add remaining ingredients.
Open Pressure Cooker lid. By now, the red beans would have softened dramatically (see below). Add oats, longan and sugar. 


6. Saute.
Saute on HIGH for 5 to 10 minutes. Stir. 

Enjoy! Serve hot or cold. The dessert will thicken further as it cools. 

Ninja Foodi OP300 Multi-Function Cooker
If you need recommendation for a pressure cooker, I use the Pressure Cooker function of Ninja Foodi OP300. This all-in-one kitchen gadget can pressure cook, steam, slow cook, sear, saute, air crisp, bake, roast and grill. Very useful! Find out more about it on the Ninja Kitchen's webpage. Quote <HEDGEHOGFOODI>  to get this at a special price of S$374.25 (U.P. S$599). 

Tried this recipe? Tag us your photos and stand to be featured!

Follow me for more recipes:

www.facebook.com/thehedgehogknows

www.instagram.com/thehedgehogknows

View cooking videos on my IG Stories "Red Bean Soup".

[Recipe] No-Sugar Peach Gum Dessert Using Pressure Cooker


The peach gum dessert is one of my family's most favourite dessert. Costing at just a fraction of the price of bird's nest, peach gum allows collagen to be easily absorbed into the body. This recipe is pleasantly sweet yet also does not require sugar, because I rely on the dried longans and red dates for their natural sweetness.

I recently started using the Ninja Foodi NP300 Multi-Cooker and the pressure cooking function has been a real time-saver, cutting cooking time to just one-third. Below is the Pressure Cooker version of my recipe, but if you would like to prepare this dessert via traditional Boiling, please refer to this recipe instead.

Ingredients from "A Healthier You"

Most of the ingredients in this recipe are available at the local wet market or Chinese medical halls. For convenience, you can also purchase them from A Healthier You, a Singapore-based online health store selling herbs, herbal tea blends, herbal soup packages and floral teas.

In particular, I like how large A Healthier You's wolfberries are. Their peach gums also contain very few black impurities and I really like how this saves me a lot of preparation time and effort (compared to other brands). 

PS: A Healthier You packages all their items in a pretty gift box, so it's suitable for gifting. Quote <HEDGEHOG 10> for 10% off. Free delivery is available for purchases above S$70.


Recipe: No-Sugar Peach Gum Dessert Using Pressure Cooker

Ingredients (Serves 4)
30g peach gum (桃胶) 
15g lotus seed
45g longan
40g red dates
20g wolfberries/ goji berries
800ml of water
Rock sugar (only if required)

Directions

1. Soak peach gum.
Soak the peach gum overnight.

2. Prepare lotus seed.
Soak lotus seeds 30 minutes. Split each into half and remove the black germ in between. 

3. Pressure Cook.
Add the lotus seeds, longan, red dates and water into the pot. Pressure cook on High for 20 minutes. Quick release when it is ready.

4. Remove impurities.
Meanwhile, remove the black impurities from the peach gum.

Tips: Using a toothpick helps me dig out those small black bits easier.

5. Continue boiling.
Add the peach gum. Continue pressure cooking on High for 3 minutes. Wait for natural release.


6. Add the wolfberries.
Add the wolfberries. Stir for 5 minutes. Enjoy!


Ninja Foodi OP300 Multi-Function Cooker

If you need recommendation for a pressure cooker, I use the Pressure Cooker function of Ninja Foodi OP300. This all-in-one kitchen gadget can pressure cook, steam, slow cook, sear, saute, air crisp, bake, roast and grill. Very useful! Find out more about it on the Ninja Kitchen's webpageQuote <HEDGEHOGFOODI> to get this at a special price of S$374.25 (U.P. S$599)


Tried this recipe? Tag us your photos and stand to be featured!

Follow me for more recipes:

www.facebook.com/thehedgehogknows

www.instagram.com/thehedgehogknows (Look out for videos on my IG Highlights "Peach Gum Dessert")


[Recipe] 4-Ingredient Hong Kong Egg Curd Pudding with Ginger


Since I can't visit Hong Kong during this virus period, I brought HK to my home with this homemade steamed egg curd pudding dessert!

For as long as I can remember, this has been one of my most favourite childhood desserts and it is really easy to prepare. Personally, I don't quite like ginger by itself (think: large slices in steamed fish), but really love it when it is complemented by the eggs and milk in this pudding. Ginger is a "warm" herb and is good for people like me who always get cold hands/ feet.

Btw, during this crazy quarantine period with many items running out of stock in the supermarket, I am glad that this dessert only requires a few basic ingredients which I usually have at home anyway.

The key tips to making this pudding successfully with nice smooth top are: 1) covering the egg curd with aluminium foil, and 2) opening the steamer lid every few minutes to release some steam. These would prevent the steam droplets from dripping onto the desserts.

Btw, if your kids don't like the strong ginger taste, feel free to omit it. While the traditional way of eating this dessert is without any toppings, feel free to add wolfberries, sweetened red bean toppings, chocolate chips etc. Have fun! :)


Hong Kong Egg Curd Pudding with Ginger Dessert
Yield: 4 servings

Ingredients
2 tbs ginger juice (from 1 ginger)
500g milk
50g sugar
4 eggs, beaten

Directions

1) Grate.
Grate ginger to yield fresh ginger juice.

2) Dissolve.
In a large bowl, add sugar and milk together. Microwave them on "High" for 2 minutes (or heat up using other methods). Stir until the sugar is dissolves.

3) Add.
Add egg and ginger juice to the above mixture. Stir well.

4) Strain.
Pour the mixture over a strainer to remove bubbles and any impurities. Fill your bowls with the mixture.

5) Cover.
Cover the bowls with aluminium foil. Steam over medium fire for 12 minutes. Open the wok lid occasionally to remove steam.

Tips #1: The deeper your bowl, the more time you will require to steam the pudding. Check every 5 minutes if you need to increase the timing.

Tips #2: You don't have to get the whole pudding fully steamed. If the centre is a bit wobbly, it is alright as the pudding will solidify upon cooling.

6) Optional - Decorate.
Add toppings, if you like.

Tips: If adding wolfberries, do soak them in water for at least 30 minutes, so that they can become plump and more aesthetically pleasing.

Serve warm or chilled. Enjoy!

Follow me on Instagram and Facebook @thehedgehogknows for more food ideas and photos! Tag me on IG or FB if you use this recipe and stand to be featured.

[Recipe] Red Bean Coconut Milk Jelly


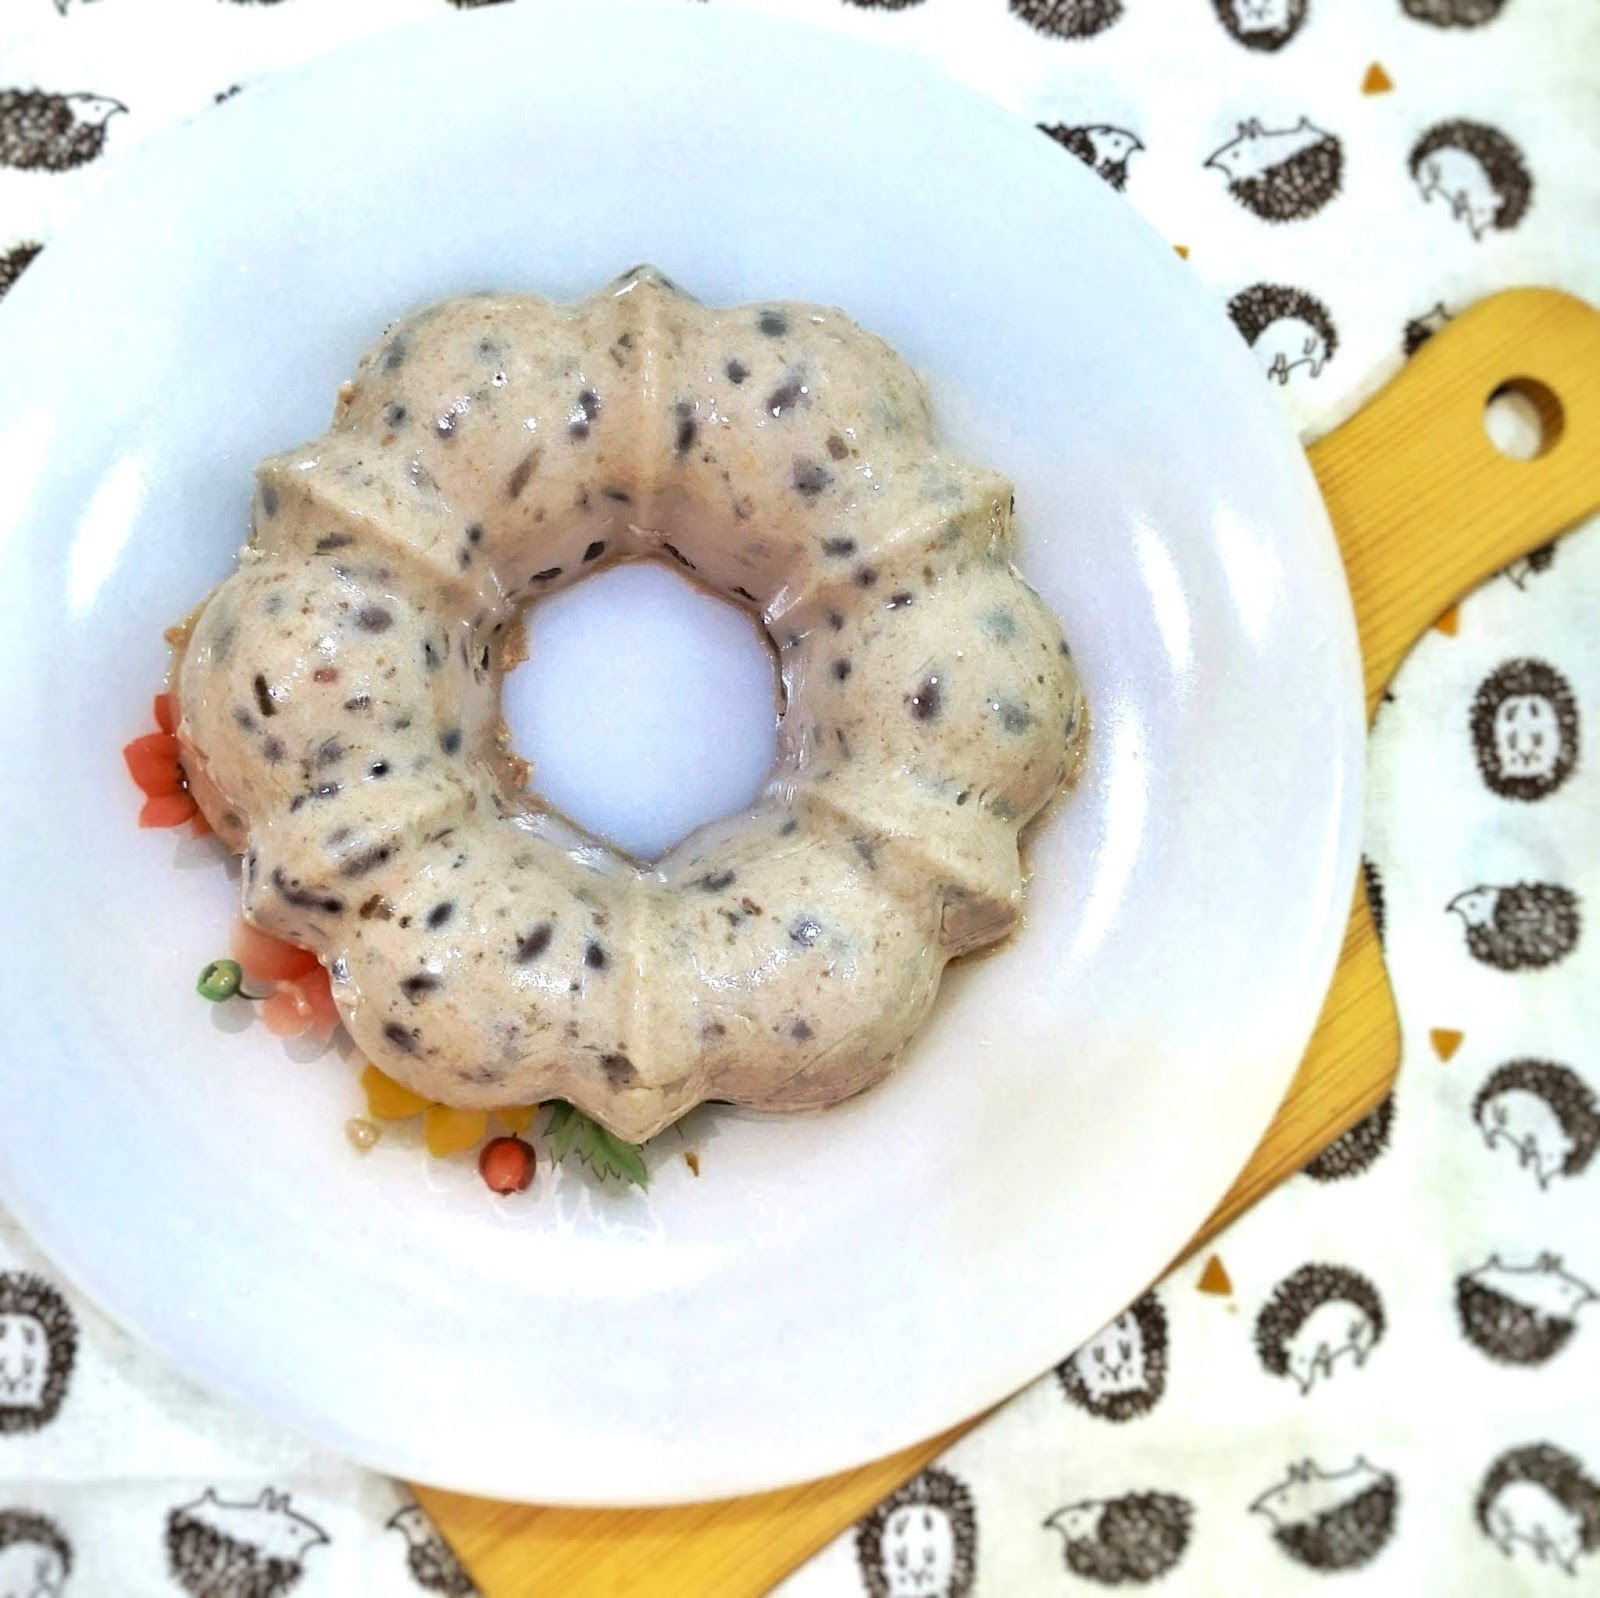
This jelly is inspired by the Hong Kong version I used to eat when I was young (砵仔糕). While that is rice flour based, I chose to do mine using konnyaku powder instead.

You will notice that konnyaku/ konjac is mostly featured in my jelly recipes, and I like this root vegetable because of its health benefits - high in dietary fibre, improve bowel movement and lower cholesterol.

This is an overall easy recipe. Enjoy!


Red Bean Coconut Milk Jelly
Yield: 2 jelly cakes

Ingredients
150g red beans
some water (for soaking and boiling the red beans)
600g coconut water
160g sugar
10g konnyaku powder
350g coconut milk

Directions
1) Soak.
Soak red beans overnight. Use enough water to ensure that the beans are covered. The next morning, drain away the water.

Tips: The beans will expand after several hours. Soaking overnight helps to shorten the boiling time. 

2) Boil water.
Bring some (fresh) water to boil. Again, use enough water to ensure that the beans are well covered.

3) Boil red beans.
Boil the beans on high heat for 10min. Lower the heat and allow the beans to simmer slowly for another 45min. Stir occasionally in between. Drain away the water when ready.

Tips: The slow boiling at low heat will ensure that the beans are cooked on the inside too. The beans would be ready when the shell have burst opened and the beans are soft enough. Don't overboil till mushy, as we still want some texture of the beans in the jelly. :)

4) Boil ingredients.
Bring coconut water to boil. Add red beans, sugar and konnyaku powder, and continue boiling till the sugar and powder are well dissolved.

5) Add coconut milk.
Lower the heat. Add coconut milk and quickly stir until well combined.

Tips: Lowering the heat and reducing the cooking time for the coconut milk prevents it from curdling.

6) Pour.
Pour the jelly mixture into mould and allow it to set.

7) Remove jelly.
After several hours, the jelly would have solidified. Remove and enjoy!

For more recipes and food pics, follow me on Facebook & Instagram @thehedgehogknows.