Showing posts with label triedandtested. Show all posts

[Recipe] Peranakan Apom Bokwa with Banana Pengat Sauce


Since my initial Facebook & Instagram posts on the hands-on Apom Bokwa Workshop I attended at The Peranakan a few weeks ago, a few of you PM-ed me for the recipe.

For those who are unfamilar with what Apom Bokwa is, it is a traditional Peranakan/ Straits Chinese dessert consisting of mini pancakes served with a rich banana sauce.

I can't say that I am the expert at making Apom Bokwa, because I also attended the workshop and learnt many new tips from Chef Gabriel Khoo. But with credits to the kind folks at The Peranakan, they have allowed me to share it online here. As usual, I have included a few tips below to make your cooking adventure a little easier.

For the real thing, do attend the hands-on Apom Bokwa Workshop at The Peranakan (Level 2, Claymore Connect Shopping Centre, Orchard Road). The restaurant also conducts hands-on Nasi Ulam Workshop.
  • Apom Bokwa Workshop: Saturdays, 3pm, S$60/pax
  • Nasi Ulam Workshop: Sundays, 3pm, S$60/pax

Nasi Ulam is a dish that is rarely available at restaurants because of the hard work required to prepare it, so don't miss this opportunity to learn it straight from the chef. Book early to get your preferred date! :)

Apom Bokwa with Pisang (Banana) Pengat Sauce

Credits: The Peranakan
Yield: 30 portions

Ingredients

(A) Pancake Batter
500g self raising flour
120g glutinous rice flour
1 tsp fine salt
1 1/2 tsp yeast
900ml water

(B) Pisang Pengat Sauce
100g water
2 pandan leaves
100g gula melaka/ palm sugar
400g coconut milk
3 bananas, sliced
1/4 tsp fine salt

(C) Blue Pea Flower Extract - Optional
30ml water
a handful of dried blue pea flowers


Directions

1) Prepare the batter.
Add all (A) ingredients, except water, together in a bowl. Mix well. Then, add water and stir until the batter is smooth.

Tips: Avoid placing the yeast and salt together. Salt will slow down/ kill the yeast, resulting in batter that may not rise.

 
2) Set aside.
Cover the bowl, preferably with a damp tea towel, to allow the batter to rise. Set aside for at least 1 hour.

Tips: Place the batter in a warm place, e.g. kitchen, because the yeast works better in warmer temperatures.

3) Boil.
To prepare the banana sauce, first boil the water with knotted pandan leaves and gula melaka. Reduce heat when the gula melaka is dissolved.

4) Stir.
Add coconut milk and bananas, stirring constantly until the sauce is thickened.

5) Remove from flame.
When the sauce is thickened, turn off the flame. Add salt.

Tips: If your mixture is too watery, add a little corn starch to thicken it.

 
6) Check batter.
After at least 1 hour, the batter should have risen sufficiently.


7) Prepare blue pea extract.
Pour hot water over the blue pea flowers. Steep for 10 min until the water is dyed blue.

8) Prepare blue pea batter.
Pour 1 to 2 tablespoon of batter into the blue pea extract. Mix well.

Tips: If the blue pea batter is still a little runny, add a little more batter. The thicker this blue pea batter is, the more defined the patterns will be later.

9) Cook.
Lightly grease the apom mould. When the oil is hot enough, scoop batter into the mould until it is 3-quarters full.

10) Design (Optional).
Add the blue pea batter. Make swirls or create other patterns.

Cover and heat until it sizzles and it is fully cooked. (You need not flip the pancake to cook the top.)


Serve hot.
It is now ready! Serve hot with pisang pengat sauce. :)


(Update) March 2019 
My friend, X, prepared some apom bokwa using the above recipe. As she did not have blue pea flowers, she used food colouring. That's fine too!


If you have tried this recipe, share your photos with us and stand a chance to be featured!
Facebook: @TheHedgehogKnows
Instagram: @TheHedgehogKnows
 

[Recipe] Doggy-Shaped Butter Cookies Using Airfryer

It's almost the Chinese New Year (CNY) again, and this year I've been so swarmed with other work that I haven't made able to start baking my CNY goodies - until just 2 weeks back.

Last year, I baked Pineapple Tarts (recipe here) that looked like little chicks to celebrate the Year of the Rooster and they were really well-received. Of course, I had fun baking them too!
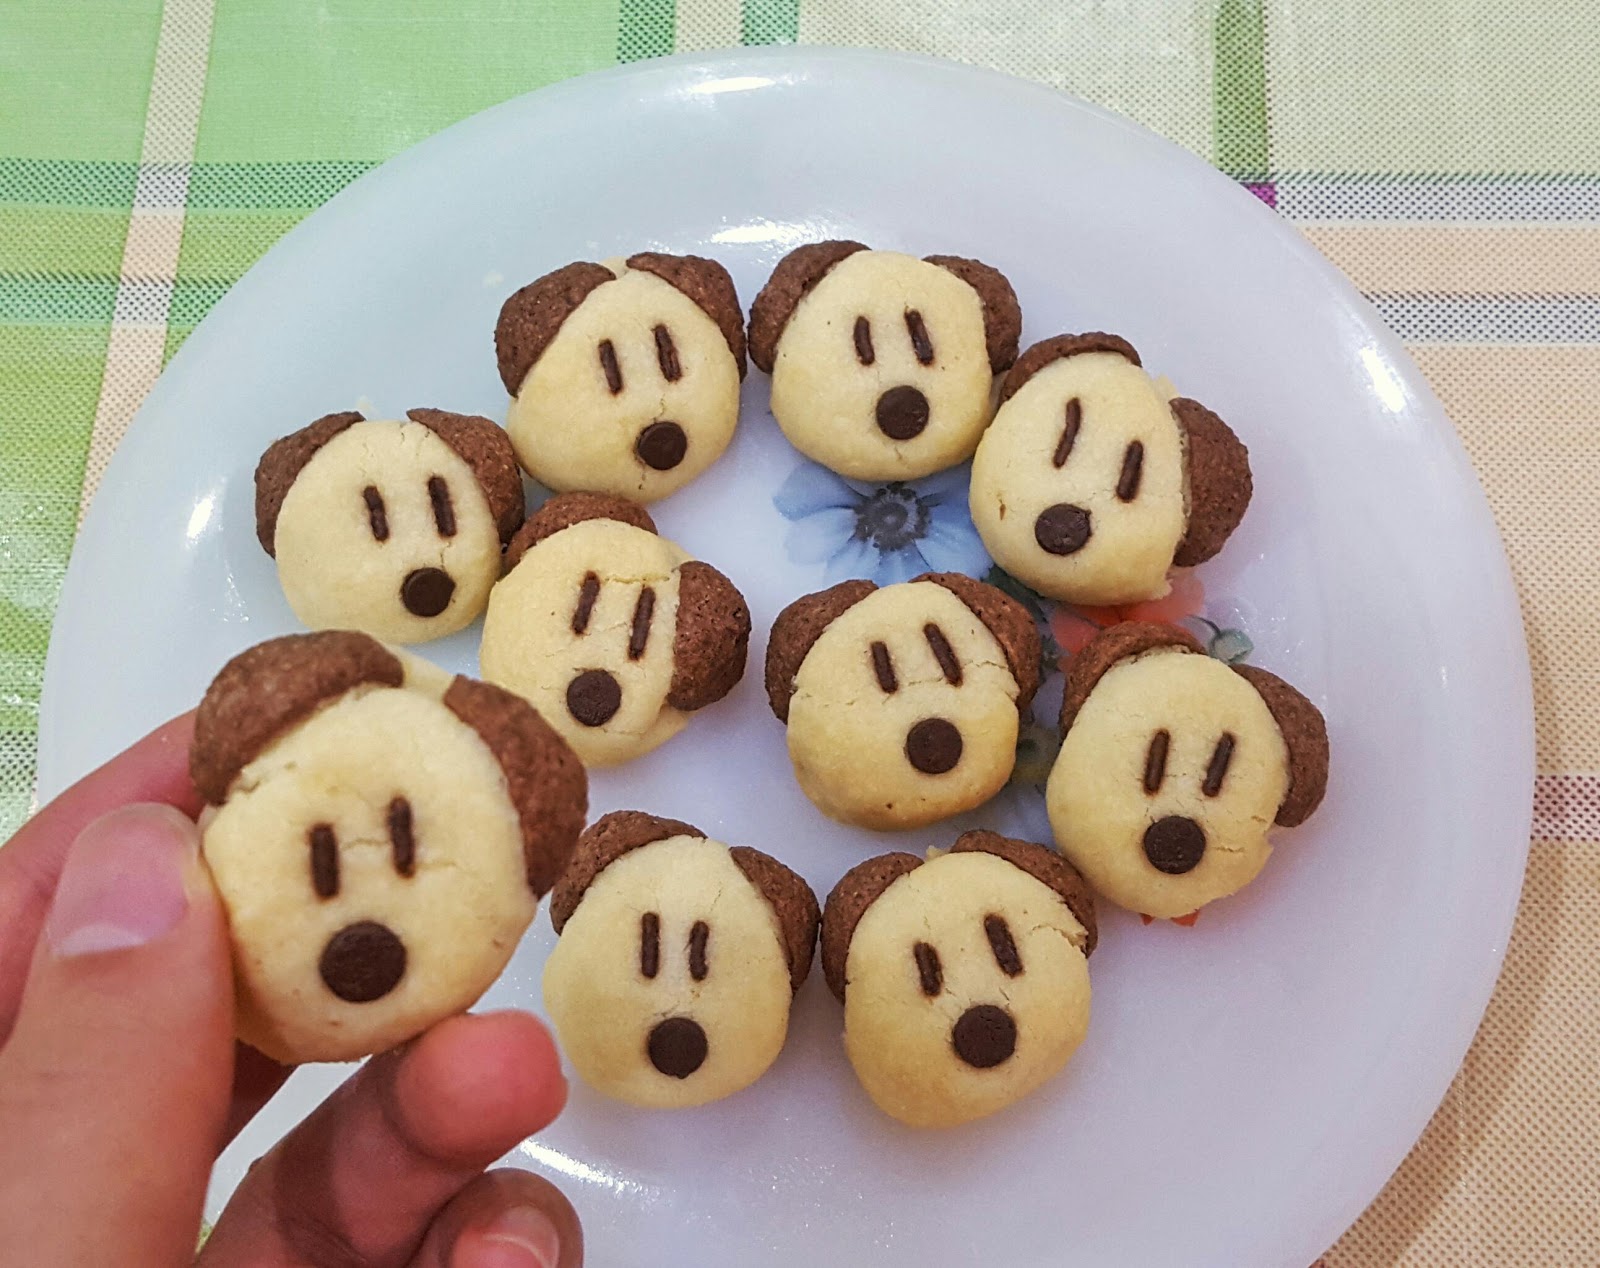
To celebrate this year's Lunar Year of the Dog, here are some cute Doggy-Shaped Butter Cookies. It has a sandy cumbly texture and I really love the strong buttery taste.

The good thing about them is that they are bite-sized and not so over-the-top, so you can actually bake them any time of the year. Have fun!

Doggy-Shaped Butter Cookies

Yield: 24 cookies

Ingredients
Basic cookie:
140g top/ cake flour (plain flour is fine too)
100g unsalted butter
40g castor sugar
Pinch of salt

Decoration:
Koko Krunch cereal
Chocolate rice
Chocolate chips

Directions

1) Cream.
Cream butter and sugar.
2. Combine.
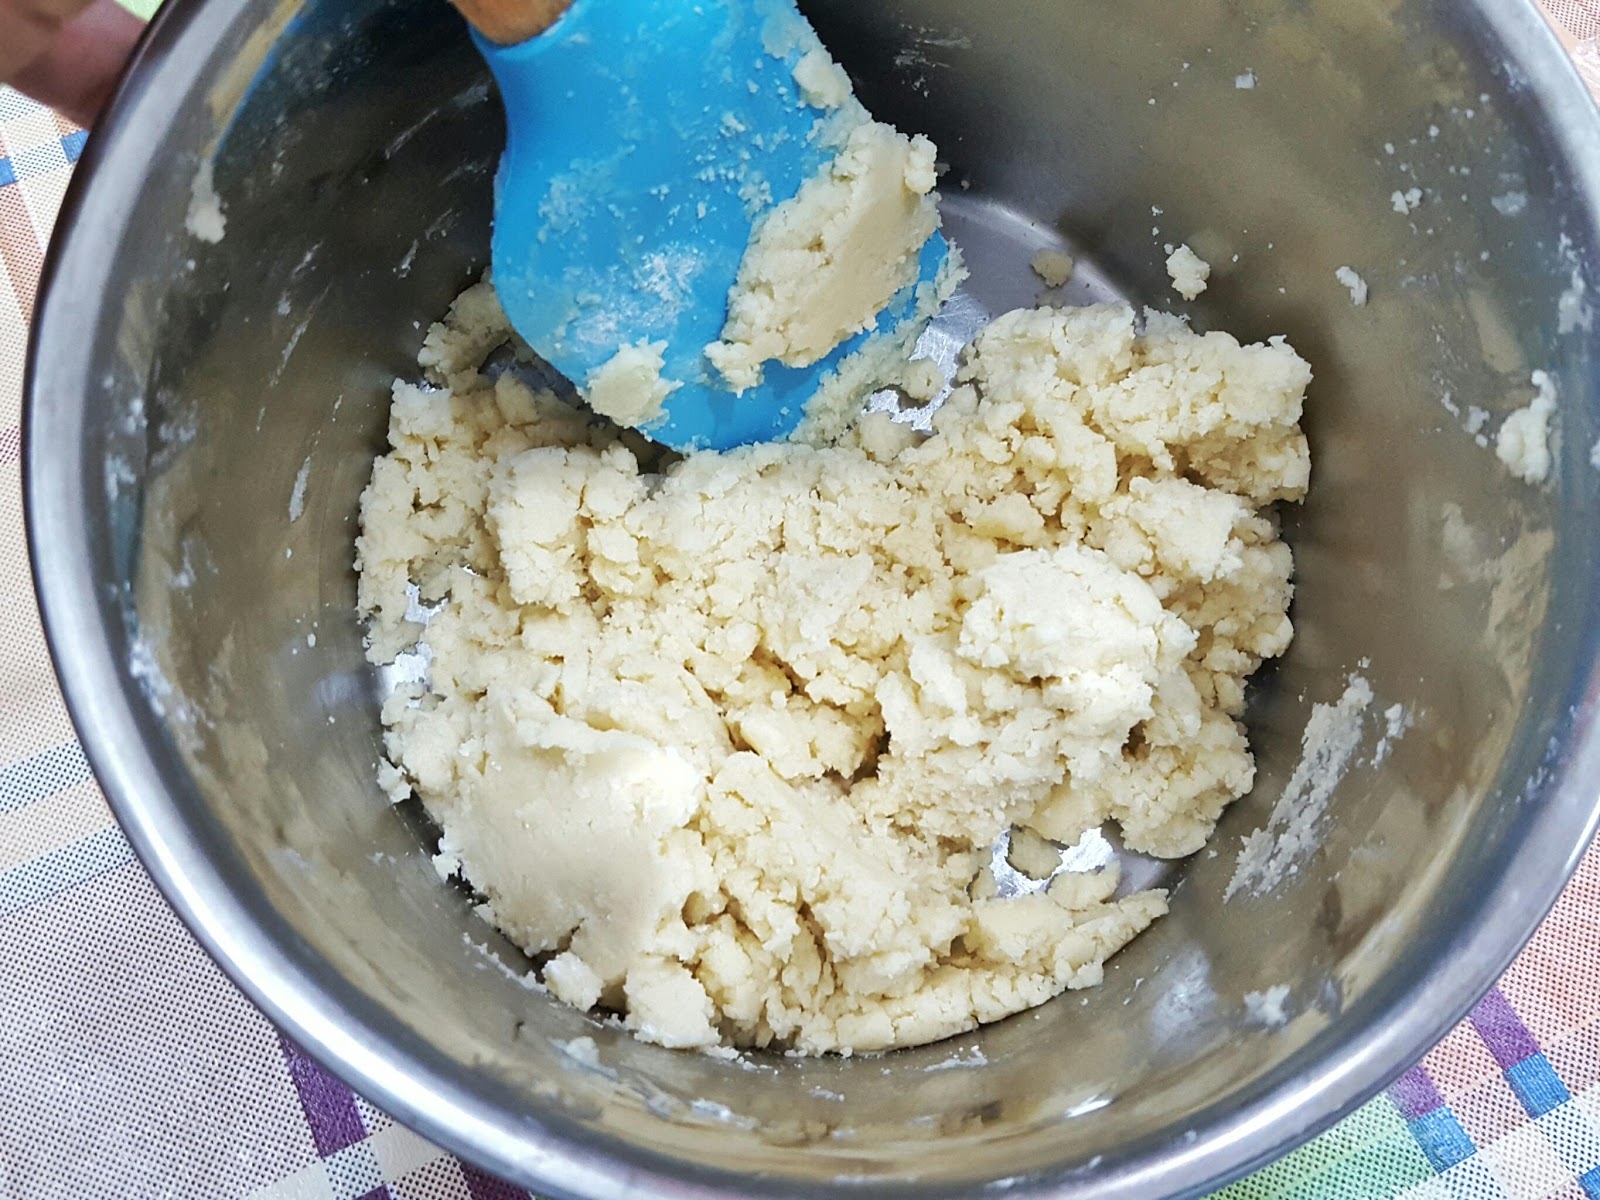
Add the flour and salt. Mix well to form a soft dough.

Tips: It will look a bit dry at this stage, but it will be fine after Step #3.
3. Cool.
Wrap the dough in a cling wrap and put it in the freezer for 15 min till the dough firms up.
4. Preheat.
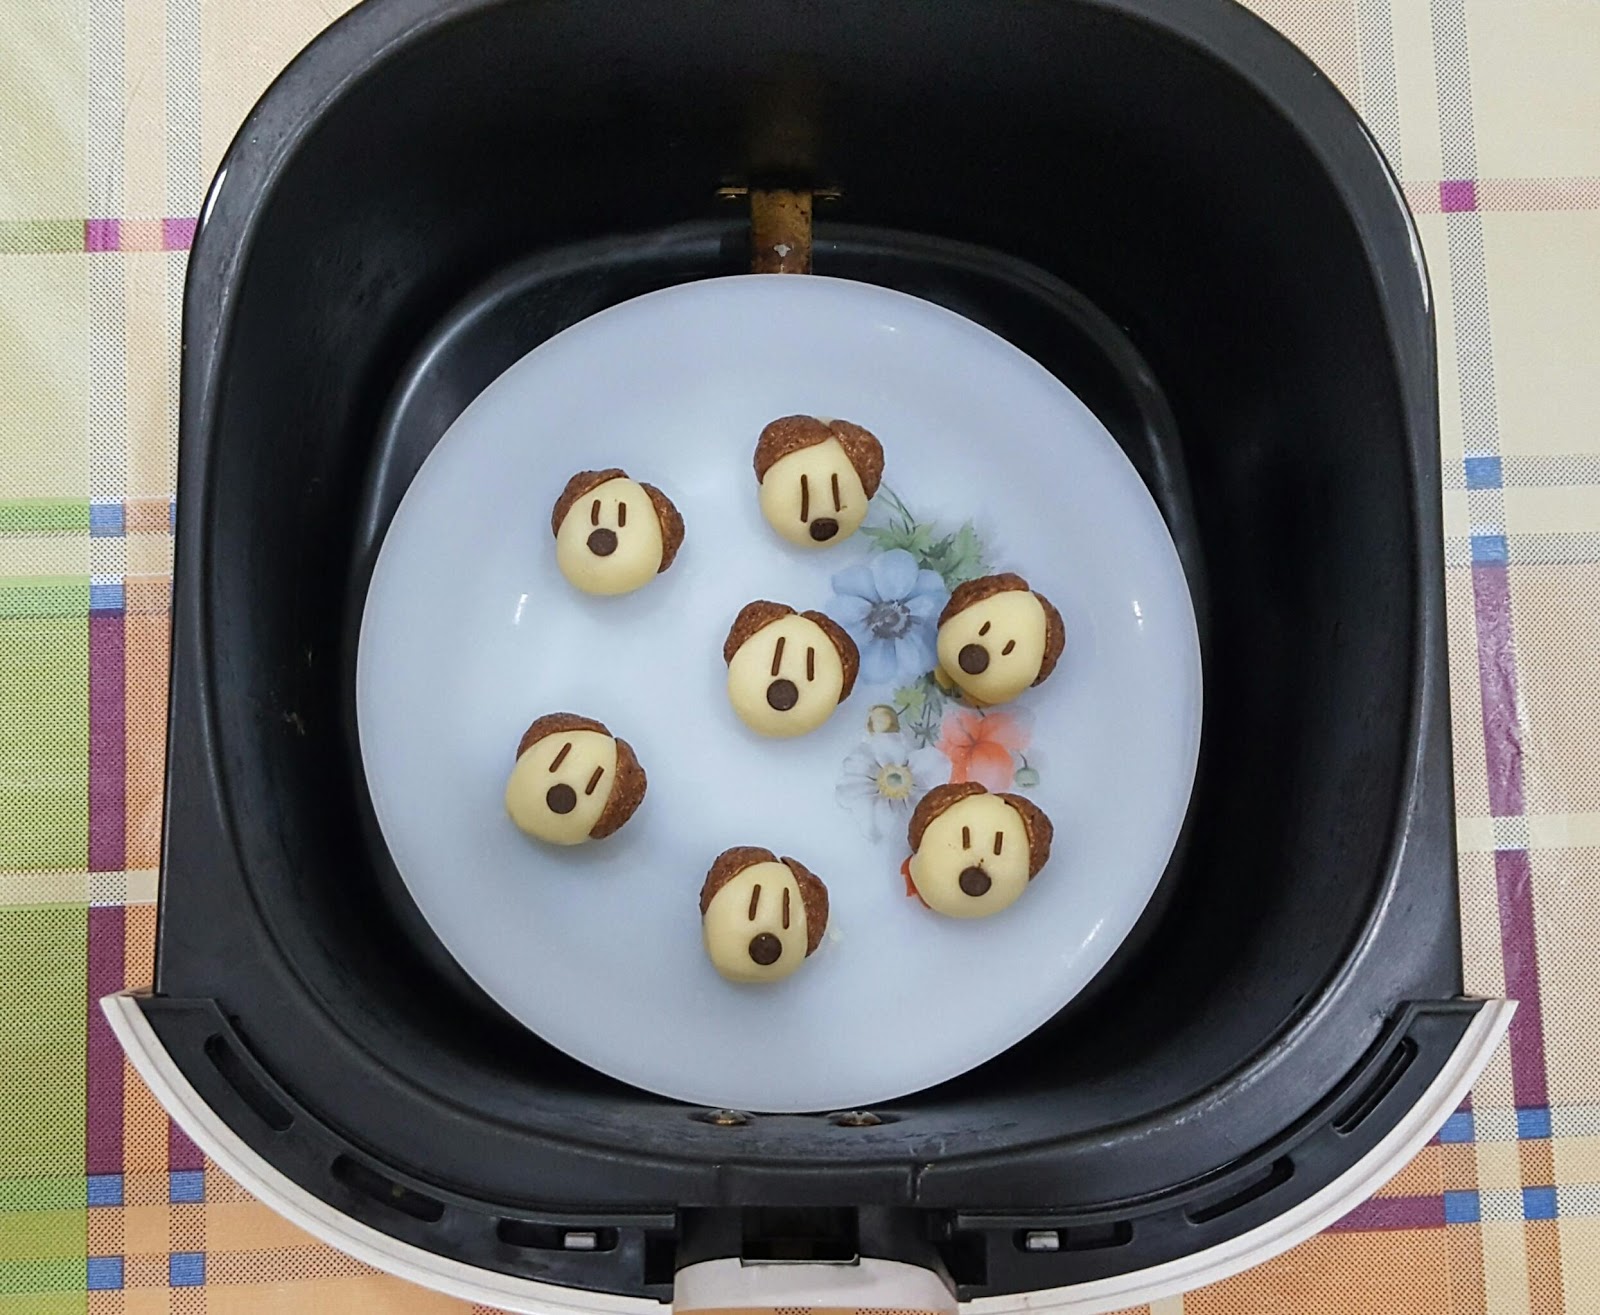
Preheat the airfryer at 150 degrees for 3 min.

5. Shape.
Weigh 10g of dough and shape them into round balls.
6. Design.
Press one of the balls slightly down to flatten it. Then, 
- Add the Koko Krunch as ears;
- 2 pieces of chocolate rice as eyes; and 
- 1 piece of chocolate chip as the nose (pointed side facing in).
Repeat for the next balls.

Tips: Flattening the balls slightly somehow reduces the chance of having "cracked" faces. :)

7. Bake.
Bake in airfryer at 150 degrees for 13 min.
Cool for at least 15 min before serving. Enjoy! :)

Fans' Feature:
I love these Doggy-Shaped Butter Cookies by Junie Chai! The red hearts give them such a pretty CNY feel. 
Tag us for a chance to be featured too!

If you have tried our recipe, share your photos with us and stand a chance to be featured!
Facebook: @TheHedgehogKnows
Instagram: @TheHedgehogKnows
Pin for later: @HedgehogSg

[Recipe] Golf Ball Pineapple Tarts Using Airfryer


Our 2016 Open-faced Pineapple Tarts Using Airfryer recipe was a major hit among our fans. Some asked how to bake the pineapple golf balls, so we decided to share the alternative version this year. The basic ingredients are the same, except that... well, it's round and the fillings are enclosed inside the pastry.

Since this year 2019 is the Year of the Pig, we decided to share a more fun version. Scroll all the way down to find out how to make these cute piglet delights!

Golf Ball Pineapple Tart Recipe
[Updated - Feb 2021]
Yield: 28 pieces

Ingredients

Tart crust
(A)
140g plain flour
2 tbs corn flour
2 tbs icing sugar
20g custard powder (see photo below)
a pinch of salt
100g butter, cold and unsalted
Custard powder

(B)
1 egg yolk, beaten
2 tsp cold water/ milk

(C) Egg wash - Optional
1 egg yolk, beaten
1 tsp milk
1-quarter tsp oil

Filling
225g pineapple jam, ready-made
1 tsp lemon juice, freshly squeezed
1/4 tsp cinnamon powder - Optional

Directions

1. Sieve all the ingredients in (A), except the butter, into a cold mixing bowl.

Tips: I usually use a metallic mixing bowl to keep the bowl cold for a longer time.

2. Add the cold butter and gently rub the butter onto the flour until the texture become like fine breadcrumbs. Take care not to overwork the dough.

Tips #1: This is called the rubbing-in method and a crucial point is to keep the batter cold during the process. As such, do use plastic gloves while rubbing so that less heat from your hands is transferred. Use the tips of your fingers too.
Tips #2: Also, use butter that is cut into small pieces so that you can finish the rubbing process faster while keeping the mixture cold. I like to use the small 10g-packs for convenience.
Before
After

3. Add the egg yolk and gently knead to form the dough. To bind the dough, add a little cold water/ milk (bit by bit) until you get the desired texture.

4. Divide the dough into 2 portions. Wrap in 2 cling-wrap batches and chill for at least 30 min till they become firm.

5. Meanwhile, you can now prepare the pineapple jam. Take out the required amount from the ready-made pack. 

6. Add the lemon juice (and cinnamon powder, optional) into the jam. Use 2 forks to loosen the pineapple jam and fibres, at the same time combining the jam, lemon juice and cinnamon powder together.  

Tips #1: When using jam from the ready-made pack, it is crucial to loosen the jam as it is usually very tightly-packed. You don't want to end up having pineapple tarts with hard toppings!
Tips #2: Ready-made pineapple jam can be quite sweet, so the lemon juice gives a nice tangy taste. However, if you don't like the sour undertones, you can replace the lemon juice with warm water.
Left: Before
Right: After (after loosening up the fibres)

7. Roll the pineapple jam into balls of 7g each.

8. Preheat the airfryer at 145 degrees for 5 min. By now, the dough should be firm enough and ready. Roll into balls of 10g each.

9. Roll each ball out flat and wrap the the pineapple jam balls inside.

10. Brush a layer of egg wash if you prefer a more golden-brown look (optional).

11. Bake the pineapple golf balls at 145 degrees for 15 min. If you like it more brown, can continue for another 3 to 5 min.
12. Cool the pineapple tarts well before storing in an airtight container. Enjoy!

Tips: You can store them for up to a week at room temperature, but I would recommend that you put them in the fridge as there are no preservatives. Enjoy!


Year of the Rooster version

If you would like to be fancy and try the Rooster version, you will need:
- Black sesame seeds
- Heart-shaped baking decorations
 
1. Follow Steps #1 to #9 above.

2. Add sesame seeds as the eyes and heart-shaped baking decorations for the crown (1 piece), beak (1 piece) and feet (2 pieces). Try to press them in well, so that they don't fall off easily later.

3. Bake the pineapple chicks at 160 degrees for 10 min.

4. Cool the pineapple tarts well before storing in an airtight container. Enjoy!

Year of the Pig version

For the piglet version, you will need:
- Black sesame seeds
- Heart-shaped baking decorations
- Toothpick

1. Follow Steps #1 to #9 above.

2. Add sesame seeds as the eyes and heart shapes for the 2 ears. Try to press them in well, so that they don't fall off easily later.

3. Using a small bit of dough, create the nose. Use toothpick to poke 2 holes for the nostrils. Brush egg wash onto the nose.

Tips: The bigger the nose, the cuter! :)

3. Bake the pineapple piglets at 160 degrees for 10 min.
 

4. Cool the pineapple tarts well before storing in an airtight container. Enjoy!
 

Have fun making other fun versions!

Want to try our other Chinese New Year recipes? Have fun here.
 
Follow us!
Instagram: @TheHedgehogKnows


Pineapple Tarts Using Airfryer


For the Chinese, different food and numbers represent different symbolisms. These in turn affect our diet and actions especially during the festive Chinese New Year (CNY) period. For instance, when we go house-visiting, we usually bring along a pair of mandarin oranges. Oranges (柑橘) represent wealth, good fortune, gold, so it's auspicious and something we like to bless our loved ones with. 

The pineapple is also an important symbol of good wealth, fortune and prosperity as its Hokkien word is pronounced as ông-lâi. It sounds like ōng (旺) "luck" or "fortune"  lâi (來) "coming", so pineapple tarts are usually one of the must-eats during the CNY period.

We all love pineapple tarts as the tangy sour taste of pineapple jam complement well with its lovely buttery crust. However, with each tin of pineapple tarts now costing more than S$30 from hotels, we decided to share our open-faced pineapple tarts recipe - using the airfryer of course. They are melt-in-the-mouth, and homemade food is always cheaper, healthier and without the preservatives.

Have fun and let us know how your pineapple tarts turn out. 恭禧發財 & 新年快樂 to our all readers!

[Update: Jan 2017] If you would like to bake Golf Ball Pineapple Tarts, click here for my other recipe :) 


Chinese New Year Pineapple Tarts
Yield: 20 pieces

Ingredients

Tart crust
(A)
140g plain flour
2 tbs corn flour
2 tbs icing sugar
20g custard powder (see photo below)
a pinch of salt
100g butter, cold and unsalted
Custard powder

(B)
1 egg yolk, beaten
up to 2 tsp cold water - if required

(C) Egg wash - Optional
1 egg yolk, beaten
1 tsp water

Filling
180g pineapple jam, ready-made
1 tsp lemon juice, freshly squeezed
1/4 tsp cinnamon powder - Optional

Directions

1. Sieve all the ingredients in (A), except the butter, into a cold mixing bowl.

Tips: I usually use a metallic mixing bowl to keep the bowl cold for a longer time.

2. Add the cold butter and gently rub the butter onto the flour until the texture become like fine breadcrumbs. Take care not to overwork the dough.

Tips #1: This is called the rubbing-in method and a crucial point is to keep the batter cold during the process. As such, do use plastic gloves while rubbing so that less heat from your hands is transferred. Use the tips of your fingers too.
Tips #2: Also, use butter that is cut into small pieces so that you can finish the rubbing process faster while keeping the mixture cold. I like to use the small 10g-packs for convenience.
Before
After

3. Add the egg yolk and gently knead to form the dough. If more liquid is needed to bind the dough, add a little cold water (bit by bit) until you get the desired texture.

4. Divide the dough into 2 portions. Wrap in 2 cling-wrap batches and chill for at least 30 min till they become firm.

5. Meanwhile, you can now prepare the pineapple jam. Take out the required amount from the ready-made pack. 

6. Add the lemon juice (and cinnamon powder, optional) into the jam. Use 2 forks to loosen the pineapple jam and fibres, at the same time combining the jam, lemon juice and cinnamon powder together.  

Tips #1: When using jam from the ready-made pack, it is crucial to loosen the jam as it is usually very tightly-packed. You don't want to end up having pineapple tarts with hard toppings!
Tips #2: Ready-made pineapple jam can be quite sweet, so the lemon juice gives a nice tangy taste. However, if you don't like the sour undertones, you can replace the lemon juice with warm water.
Left: Before
Right: After (after loosening up the fibres)

7. Roll the pineapple jam into balls of 6g each.

8. By now, the dough should be firm enough and ready. Dust the working surface, cutter and rolling pin with flour.  Preheat the airfryer at 150 degrees for 5 min.

Tips: If you prefer having less flour to clean up later, you can roll the dough out in between 2 sheets of parchment paper instead. But do remember to still dust the cutter with flour! 

9. Remove the 1st batch of dough from the fridge and roll out flat till about 5 to 7mm thickness. Cut into the desired shape/ pattern using the cutter. You should be able to cut out about 10 pieces.

10. Spread the 10 pieces out on the baking tray lined with parchment paper. 
Optional: Brush the crust with egg wash (egg yolk + water) lightly and evenly.

Tips: I like to improvise the steaming rack as my baking tray, as the airfryer works best with good airflow circulation (see photo below).

11. Bake the tart crust at 150 degrees for 6 min.

12. When the 6 min is up, open the airfryer basket and add the pineapple jam balls in the middle of each tart crust. Close the basket and continue baking at 150 degrees for another 5 min till the tart becomes golden brown.

Tips: It is important to add the pineapple jam only at the last 5 min to ensure that it doesn't become burnt and dried up.

13. Repeat Steps #10 to 13 for the other batch of dough.

Tips: It is recommended to work on the dough in batches, as firm dough creates clearer imprints.

14. Cool the pineapple tarts well before storing in an airtight container. 

Tips: You can store them for up to a week at room temperature, but I would recommend that you put them in the fridge as there are no preservatives. Enjoy!


Update (26 Jan 2016)
These are Evelyn Ng's melt-in-the-mouth pineapple tarts using our recipe! She baked them almost as soon as this recipe was posted. Looks so professional, just like store-bought! 
Credits: Evelyn Ng

If you have tried this recipe too, share your photos with us on Facebook!
Instagram: @TheHedgehogKnows